I haven’t backpacked in the wilderness in ages. The first time I backpacked was at Inyo National Park in Northern California in 2011. The second time I backpacked was this August 2020, in one of California’s most well known national parks, Yosemite. So, am I a seasoned pro at wilderness backpacking? Uh, most definitely not. I’m a beginner. I’m a brown female. I am NOT athletic by any means. I also don’t have too many friends who enjoy doing stuff like this (note to self, find my backpacking tribe)!
But I was dying to get into nature and away from the pandemic and everything else that is currently going on in the world. So when one of my guy friends serendipitously asked me to join him, I jumped at the chance! He invited two more of our friends and we soon had a group of 4. Out of this group, 3 of us had backpacked before and 1 was a complete newbie, who was apprehensive about the bears and pooping in the wild. So how did we manage? Read on to find out everything you need to know if you want to backpack in the wilderness at Yosemite National Park.
What does Backpacking in the Wilderness mean?
Backpacking in the wilderness means you carry all of your gear (sleeping bag, tent, bear canister to store food, clothes, stove, food, water) on your back to stay outside for a night or longer. You can either stay in a tent that you put up, or on a hut along the trail. One of the biggest pros of backpacking is access to pristine wilderness, lack of crowds, and solitude (a fantastic way to social distance during Covid-19). If you’re backpacking in the wilderness at Yosemite National Park, please read up on the rules and regulations at that national park and familiarize yourself with the Leave No Trace ethics.
Where is Yosemite National Park?
Yosemite National Park is about 170 miles or 3.5 hours away from San Francisco. In short, it’s a pretty easy road trip. As you get closer to the park, the roads become quite windy. We were not headed into the Yosemite Valley but rather to the Porcupine Creek Trailhead. Here we would park our cars to begin our backpacking in the wilderness adventure. Our driving route still took us through the scenic Tioga Road so we got to ooh and aah at the beautiful scenery unfolding around us.
Is Yosemite National Park Open?
Yes Yosemite National Park is currently open with limited services and facilities to those with day-use reservations. reservations for camping, in-park lodging and wilderness permits. In order to backpack and camp in the wilderness you must get a wilderness permit.
How Can You Obtain a Wilderness Permit?
Step 1: Decide where you want to begin your overnight hike
Check this map to figure out your starting point or the name of your trailhead. We chose the Porcupine Creek trailhead which is #15 on this map.
Step 2: Check to see if reservations are available for the trailhead
Check here if reservations are available for your trailhead of choice. For 2020, 40% of permits that would be have been available first-come, first-served are instead available by lottery two weeks in advance. Submit a request 15 days in advance of your hike’s start date. The lottery will run daily and be processed the next day. Unreserved permits remain available up to 9 days in advance. It is not possible to obtain a wilderness permit reservation fewer than 9 days in advance.
Step 3: Apply for your permit
Wilderness permits are available here. To apply for your permit you need to know the following (I’ve inserted my itinerary as an example):
- Hike Start Date: August 07
- Starting Trailhead: Porcupine Creek
- 1st Night’s Camp Location: North Dome
- Group Size: 4
- Trip Leader Contact Information: Enter in your information
- Hike End Date: August 09
- Ending trailhead: Porcupine Creek
Each reservation costs $5 plus $5 per person. We submitted three different applications for the same trailhead for three different dates. We ended up getting one confirmation for a weekend in August. You’ll typically get a response within 2 business days of applying.
Step 4: Permit Education
In 2020, you will receive your permit via email AFTER you participate in a live education online session. Two weeks prior to your permit date, you will receive information via email about the education session.
What You Need to Know About the Porcupine Creek Trail & Campsite
1. Parking
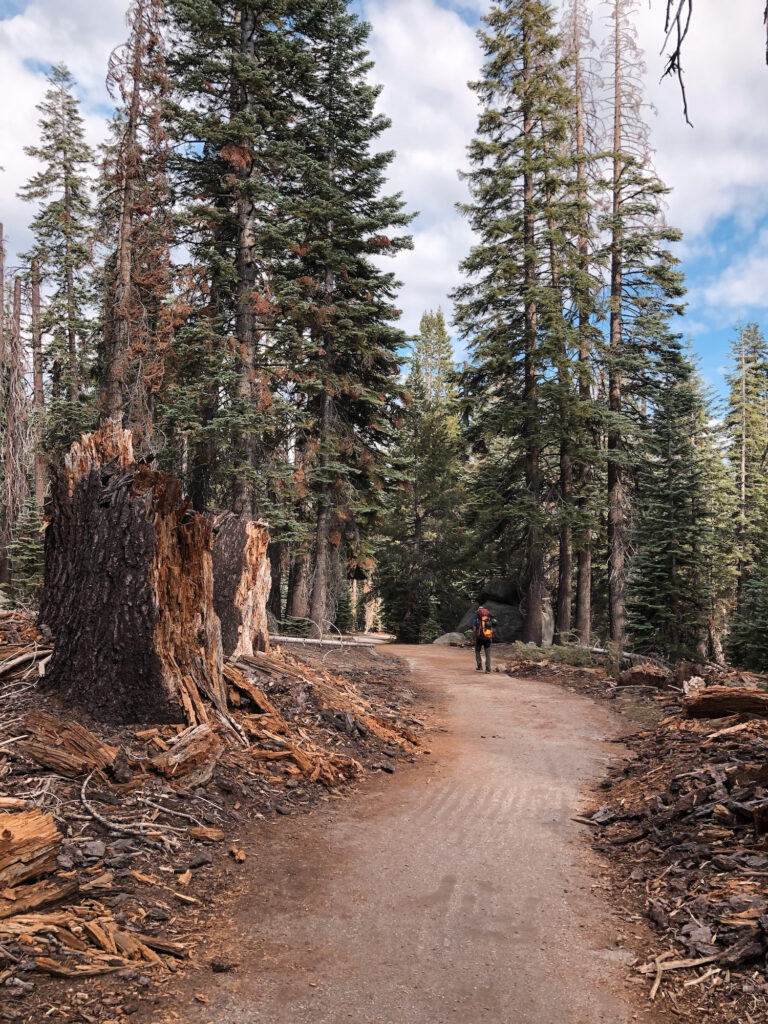
We entered Porcupine Creek Trailhead in our Google Maps and about 3.5 hours later entered the park via the ranger’s station. You will need to stop here to show your permit and pay the 35$ entrance fees. Make sure you have your mask handy as you will need this while speaking to the person in the kiosk. Parking is easy and available at the trailhead because this trailhead is off of Tioga road and bypasses the Yosemite Valley. This also means you’re saved from the crowds swarming in the valley and you’ll pretty much have the trail to yourself. The North Dome camping site we had chosen for backpacking in the wilderness, is about approximately 4 miles from the parking lot. We met almost no one on the entire trail. This is the perfect trail to hike during Covid-19! Pro Tip: Have your mask handy and wear it if you do come across other hikers.
2. What’s the trail like?
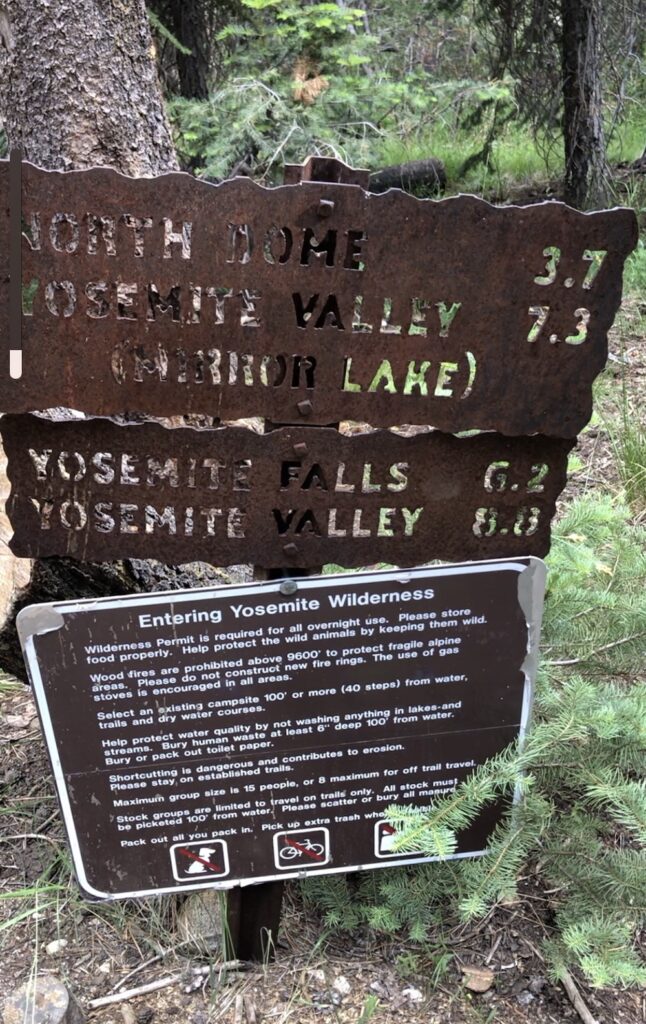
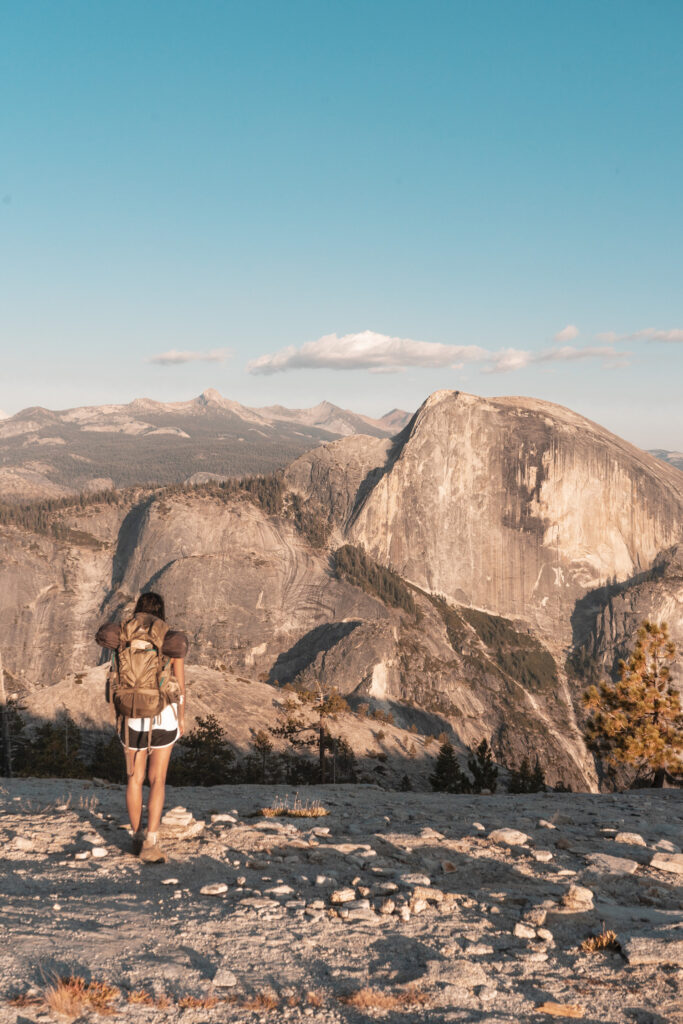
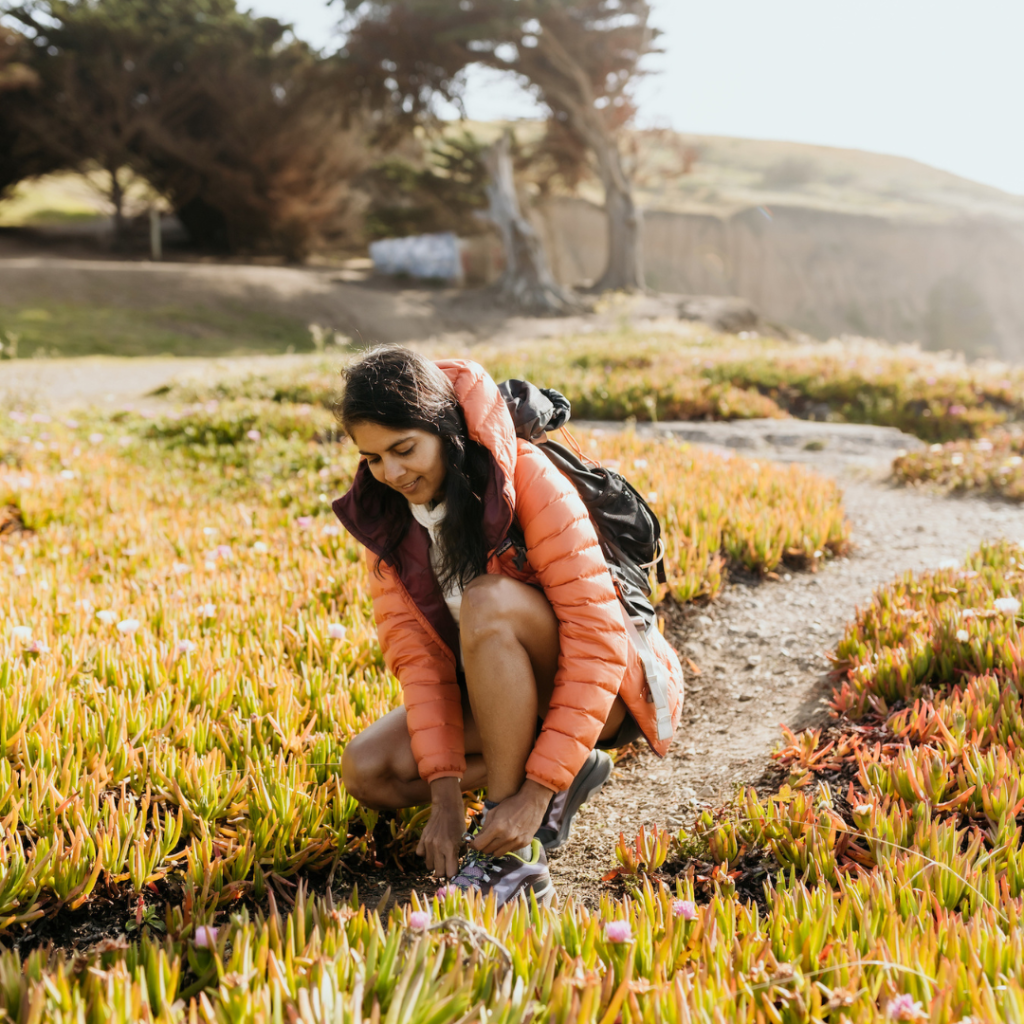
The scenery is mostly through mixed conifer forest and with almost no incline in the beginning. Get used to lots of green and orange tones around you! You’ll soon come to a sign that says North Dome and Yosemite Falls. You want to choose the North Dome path which is when the incline starts. It isn’t too steep but with a backpack weighing 25-30 pounds…let me just say you could hear me panting like a dog! Pro Tip: Good Hiking boots with ankle support are highly recommended for backpacking in the wilderness.
3. You’re not Strong Enough!
During this hike we stopped a few times for breaks and to re-adjust our packs. My shoulders were starting to pinch at one point and I was assaulted by self-doubt. What had made me think I could carry a 25-30 pound backpack and hike?! My mind was screaming “you aren’t fit enough to backpack in the wilderness!” I told it to shut up. I stopped and asked my friend to help me re-check my straps. After adjusting it and re-hoisting my bag, I felt better. As we began to climb toward our campsite, I started to trail behind my friends. I’m a slow up-hill hiker so I don’t bother trying to keep pace. Instead I looked around at the mountains looming to my right, the sunlight falling wistfully through the trees creating that golden hour glow. I listened to the sounds of the birds. Sounds I hadn’t heard in the city. And I surrendered. Pro Tip: Go at your own pace, it’s not a race. My body is built differently from yours, so I can’t expect it to perform the same way yours does.
4. Spotting the Domes!
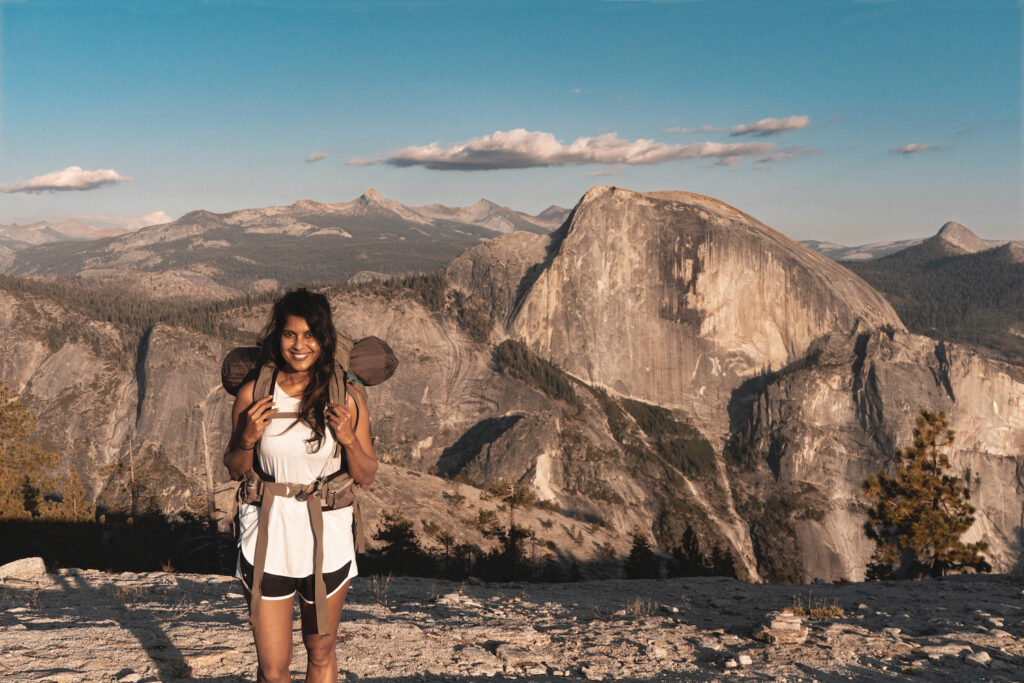
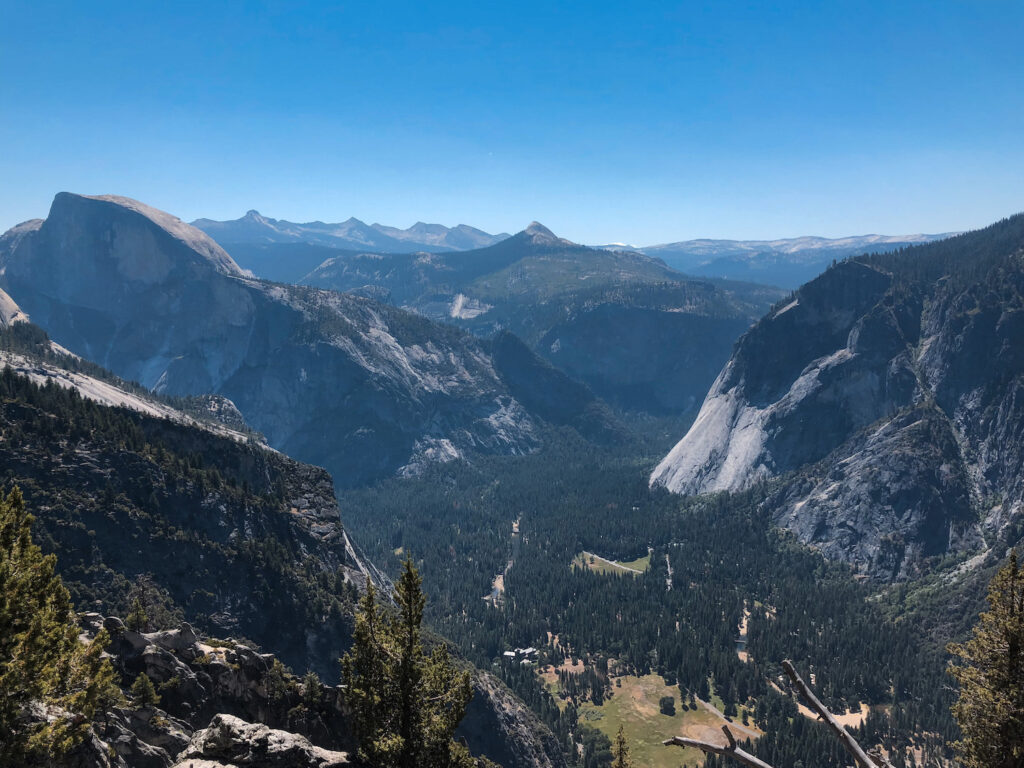
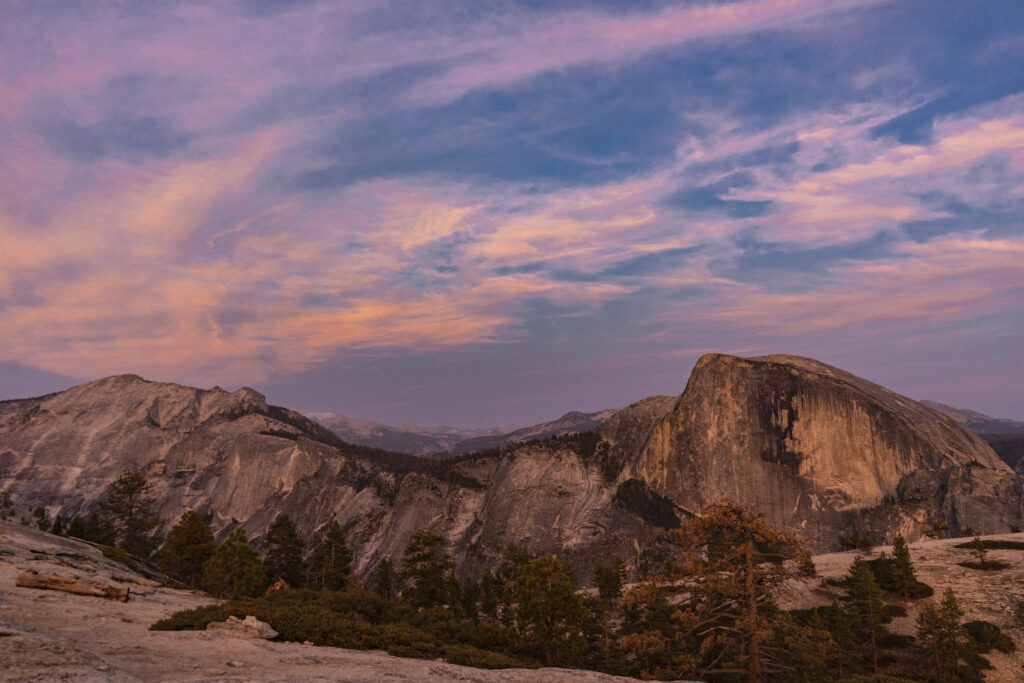
After the first uphill, the trail opens up to a massive granite dome on the left. To my shock, I realize it is Half Dome. The very Half Dome I set out to climb in 2011 but failed (that’s for another article someday)! I watched as the granite dome glowed in the setting sun. I felt like I was so close I could reach out and touch it. One side is a sheer face while the other three sides are smooth and round, making it appear like a dome cut in half. Right next to Half Dome is also North Dome. While our wilderness campsite was North Dome, we stopped just before the trail that leads to North Dome and camped there. See map below. The red dot indicates the North Dome site and the purple indicator is where we camped, on the little hill right across from it. Pro Tip: Hiking poles are super helpful as you hike up hill.

5. The Campsite
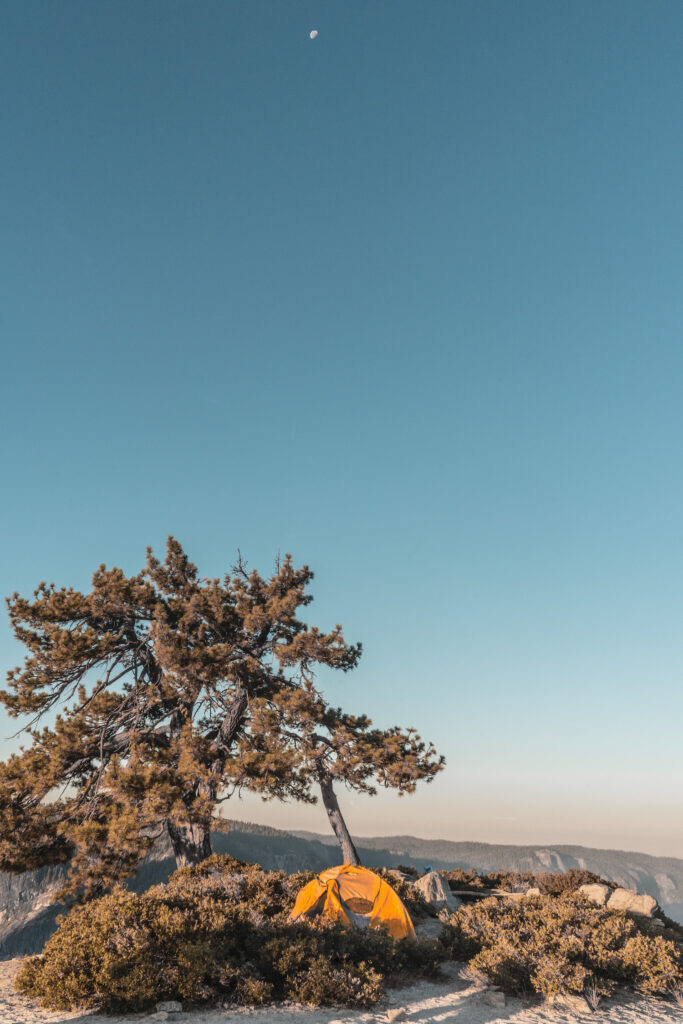
We continued hiking, now at a descent down the face of exposed rock, meaning no shade. Within minutes we were walking on more exposed rock and heading toward some bushes under a tree. There were a few natural ledges/rocks in a circle that almost looked like it had been made for a camping setup. From this spot we could see North Dome, Half Dome, and the Yosemite Valley. We decided to setup our tents around this area. When you’re backpacking in the wilderness, you must setup your tent AT LEAST 100′ away from a water source (none up here) and the trail. Pro Tip: Pick a spot to camp that has good views 🙂 We setup our tent facing Half Dome.

What to do Once You’re at Your Campsite
1. Setting Up the Tent
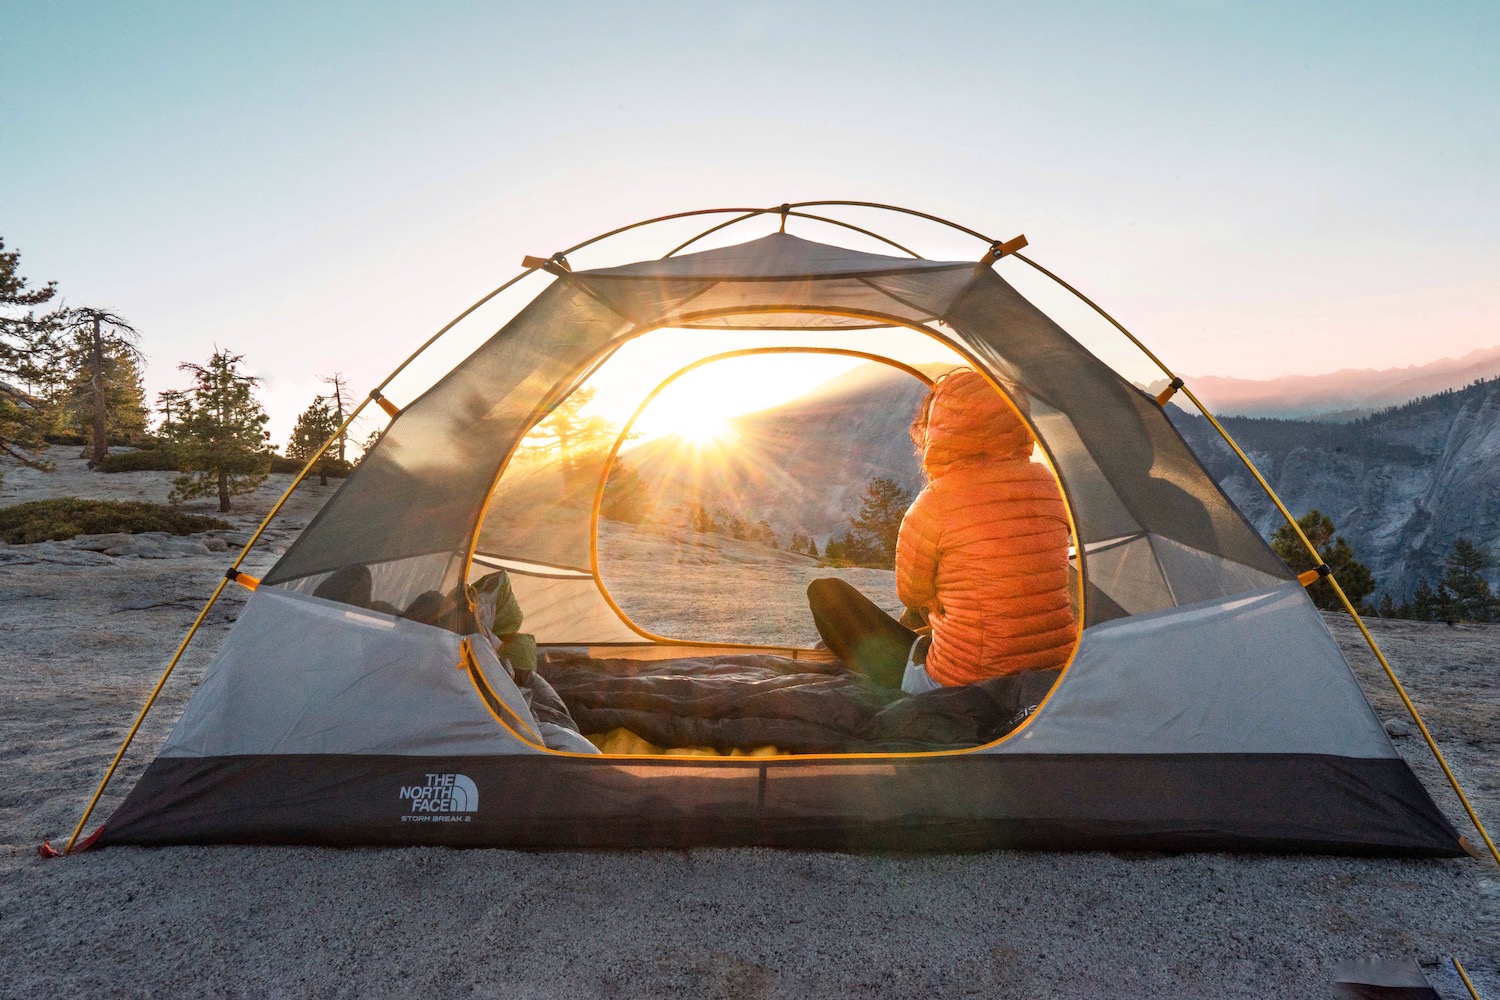
Once we setup our tents, the next thing was to enjoy the ridiculously beautiful sunset that was happening around us. The pictures don’t do it justice but I felt like I was on a different planet. We were also the only 4 campers in this area. I soon forgot all about Covid-19 and my life in the city. Pro Tip: Make sure to start your drive early in the morning so you have plenty of time to setup your tent in the daylight. There might be little bugs crawling/flying around. Change into your full pants/top (night clothes) and use Deet as needed. I bought a t shirt to change into after the hike and wore silk thermal pants to keep me warm for the night. I also had one full sleeves top and my down jacket as the night wore on.
2. Water Situation
The one thing about this site is there is no water source close by. You will need to hike down about a mile or two to a creek to fill up water and then climb back up to the campsite. For this reason, we filled up at least 2.5Liters of water in our water bladders in our backpack at the beginning of our trip. In addition, my friend carried an extra jug of water that we could use for cooking.
3. Cooking
As the sun set, we scrambled to setup our stove. We had a jetboiler and the MSR PocketRocket. We also had a small lantern and two headlamps that we used for light. After fiddling with the jetboiler that refused to work, we hit the jackpot with the MSR. The MSR is a lightweight travel stove that comes with a pot and a measuring cup. You can boil up to 2-3 cups of water in the pot at once. Pro Tip: Try out your equipment at home before lugging them in your backpack. Remember, when backpacking in the wilderness, every little bit of weight counts. We could have avoided carrying that jetboiler since it didn’t work anyway!

What type of Food do You Need for Backpacking in the Wilderness?
Freeze Dried Food
So..I’m a foodie. That means I’m always looking for delicious food! For backpacking in the wilderness, I highly recommend you consider freeze dried food. Freeze drying is a delicate process in which the food is dehydrated by freezing it in a strong vacuum. The goal is to remove the moisture or water. I ordered packets like organic fried rice (YUM), granola with milk and blueberries (delish), scrambled eggs (not bad) etc while my friends got Kathmandu lentil curry (a little dry), Pad Thai (which was delicious) and coconut rice with Cuban beans.
The instructions on the back of the packet will tell you how much water (mostly 1-2 cups) you need. Most of the food needs boiling water so use your stove to boil water. Then simply pour the necessary amount into your packet, seal and let it sit for the required amount of time (5-10 minutes). Once it’s done, stir and eat with a spoon. I used a lightweight titanium camping spoon. These can be bought at any sports store or on Amazon. 🙂 Pro Tip: One packet can be split between two people.
Washing Dishes
Just like at home, you need to rinse your dishes before going to bed 🙂 Backpacking in the wilderness in Yosemite means bears. Bears have an extremely strong sense of smell and can smell animal carcasses from 20 miles away. This probably means they can smell our food too. So it is very very important you store all food, trash, uneaten food in a bear proof canister. These canisters can be rented at any sports store or even at some of the national parks. We rented ours at Sports Basement. That’s why it’s super critical to wash plates with water and soap and then store them away. You also need to put any scented toiletries in the canisters as well. Pro Tip: Avoid bringing perfumes, lotions and creams, except for sunscreen 🙂
How To Organize Your Time in the Wilderness
Friday Evening: Arrival
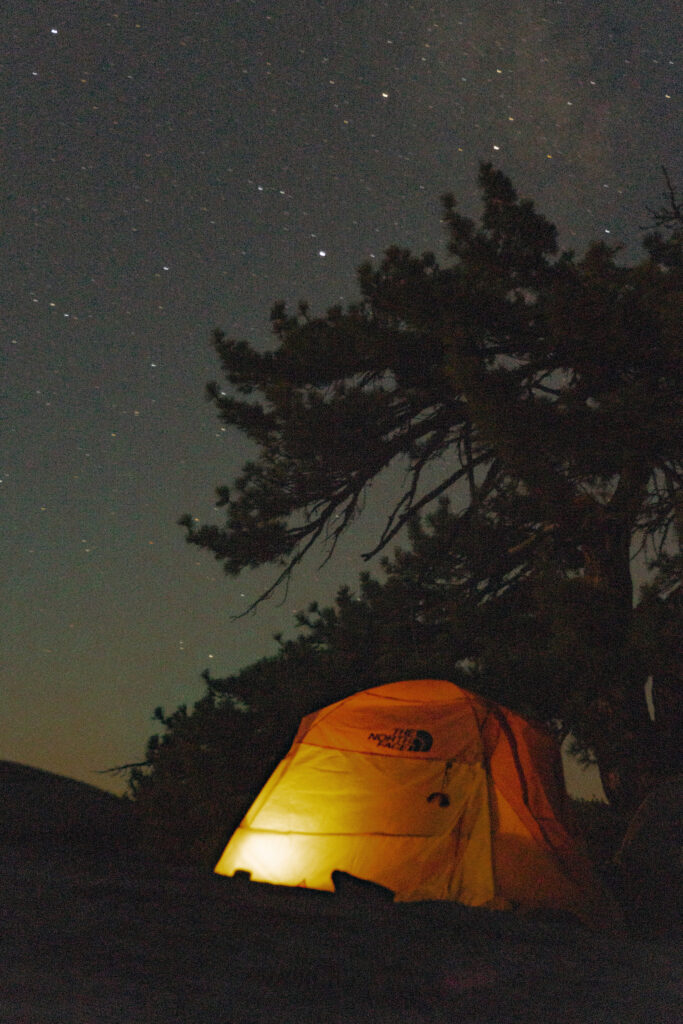
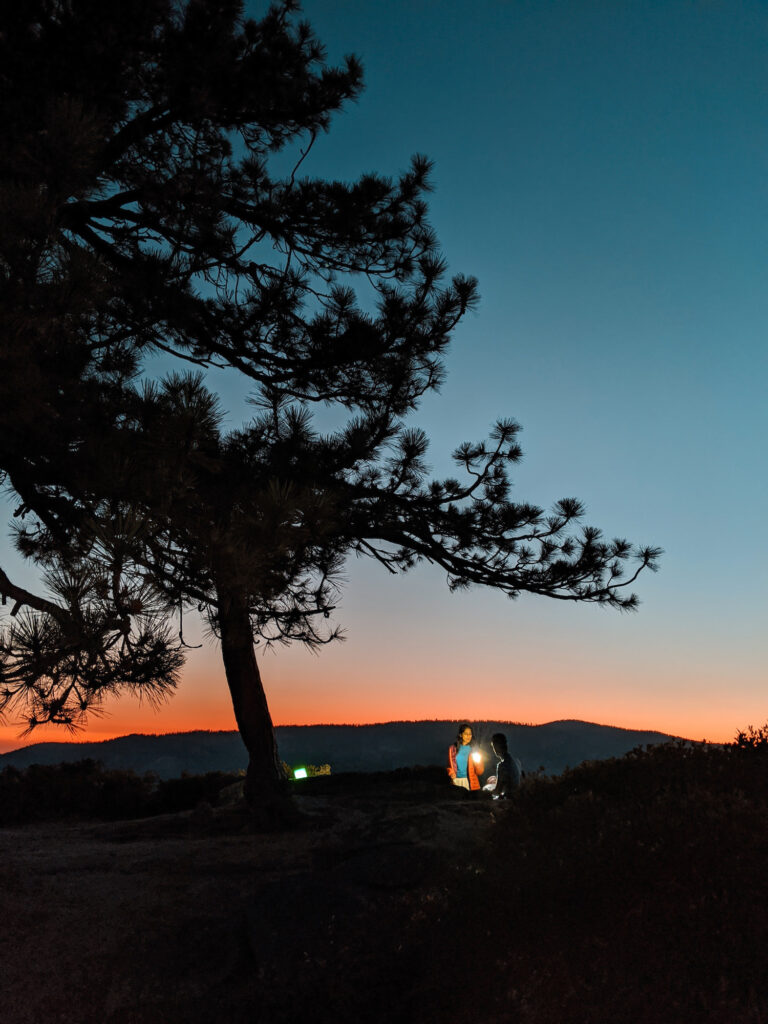
We basically spent Friday evening setting up our tent, cooking dinner, cleaning dishes and enjoying the night sky. I dabbled in some night photography since your girl here kinda enjoys her photography as you may know if you’re following me on Insta! While we went to bed by 9ish-10pm, I didn’t really fall asleep for a while. Every sound I heard, I thought it was a bear. Racoons and rats are also a possibility but more than those critters, the bears are what you need to beware of. For the first time I really felt vulnerable. If a bear did attack, there is NOTHING any of us could do. We were all alone with only the milky way, granite rocks, and trees for company.

But the night went off without a glitch. At about 3am, my friend and I shifted around in our tent and woke up in unison to pee. That was when we noticed the full moon bathing the Half Dome and the entire area in her yellow light. It was just an incredible, almost overwhelming scene. I was kind of scared at how other-worldly it looked and just as quickly crawled back into the tent, put on my ear plugs and I *think I finally fell asleep. Pro Tip: Bring at least a Gorilla tripod for night photography.

Saturday: Day Hike to Yosemite Falls
1. Breakfast
Yosemite falls is best known for its waterfalls! So on Saturday we decided to hike down (phew!) to the Yosemite Falls. It promised to be a super hot day. Sunrise was around 6ish and the light streamed over Half Dome and into our tents, waking us up bright and early. We made some coffee. I had my freeze dried breakfast of granola, milk and blueberries (just 1/2 a cup of cold water) and this was my favorite breakfast on the trip! I also supplemented that with a scrambled eggs packet.


I made sure I had enough to eat for the hike. I also had quite a bit of drinking water. Once we had washed away the coffee mugs and stored everything back in the bear canisters, we tidied up our area, lathered the SPF and began our downhill hike. Pro Tip: Yes you leave your tents and big backpack behind. Just carry your wallet, phone, snacks, water bladder in your day backpack.
2. The Trail
Pretty soon we reached the creek and made sure to fill up water for the duration of the hike. The rest of the hike meandered through forest before we started climbing again. The views to our left were incredible. We could now see our campsite, Half Dome, North Dome and the Yosemite Valley below us. The trail then progressed downward into a switchback. A few hikers warned us about a bear cub sighting. We stayed alert but didn’t encounter anything. I kinda wanted to see a bear and was disappointed, but we saw plenty of deer!
3. The Pools
We finally reached a rocky area full of little pools. We found a shady spot and put our day backpacks there. My friends had their t shirts off and in the cold water in seconds! I hesitated. I don’t like cold water and I didn’t bring my swimsuit. Thanks to their encouragement, I took off my t shirt, and waded in with my shorts and sports bra. It was COLD but it felt great in a matter of seconds since it was SO hot outside. We spent the afternoon frolicking in the pools and enjoying the spectacular views. We had our protein bars and trail mix for lunch since we weren’t exactly carrying around our stove and freeze dried food with us for the day hike.

4. Hiking Back Up to Camp
Around 2pm we reluctantly peeled ourselves out off the pools, cleaned up, and began the hike back up to our campsite. My shorts and sports bra dried up in no time! The hike back was mostly uphill and painful. My legs didn’t want to move. The heat was beating down on my head. I was dripping sweat. I sweat A LOT. I kept hydrating thanks to my water bladder. The nozzle hangs conveniently over my shoulder so it’s easy to keep sipping water. We reached our creek, and filled up all the water we could so we would have enough for cooking that night. We continued trudging toward our site. My friend and I sang songs (he sang, I panted), and finally made it back to our temporary home. I had never felt happier to be “home”. I cleaned up immediately. I recommend using some wet wipes. Just remember, pack the dirty wipes back into your backpack.
5. Free time!
For an hour or so the 4 of us did our own thing. We went from lounging in one tent, chuckling, and enjoying the Half Dome view, to solo time. I spent sat on a rock facing the valley and journaled in my little blue book. I also just gazed out at the vast landscape in front of me, unable to comprehend what I was seeing. It felt overwhelming. As the sun set and the sky turned all kinds of colors, we came together to watch. In this moment, I felt there was something bigger than me out there.

That night, post another sumptuous dinner, we lay out watching the stars. I could clearly see the milky way. We contemplated about the age-old question of life on other planets. We also took some melatonin before going to bed. I slept much better. We spotted two other campers further down from us, so I felt a lot better! Pro Tip: Pack ear plugs, they just help you from being startled every time you hear a rustle.
Sunday: Pack out, Hike to Indian Rock and to the Car
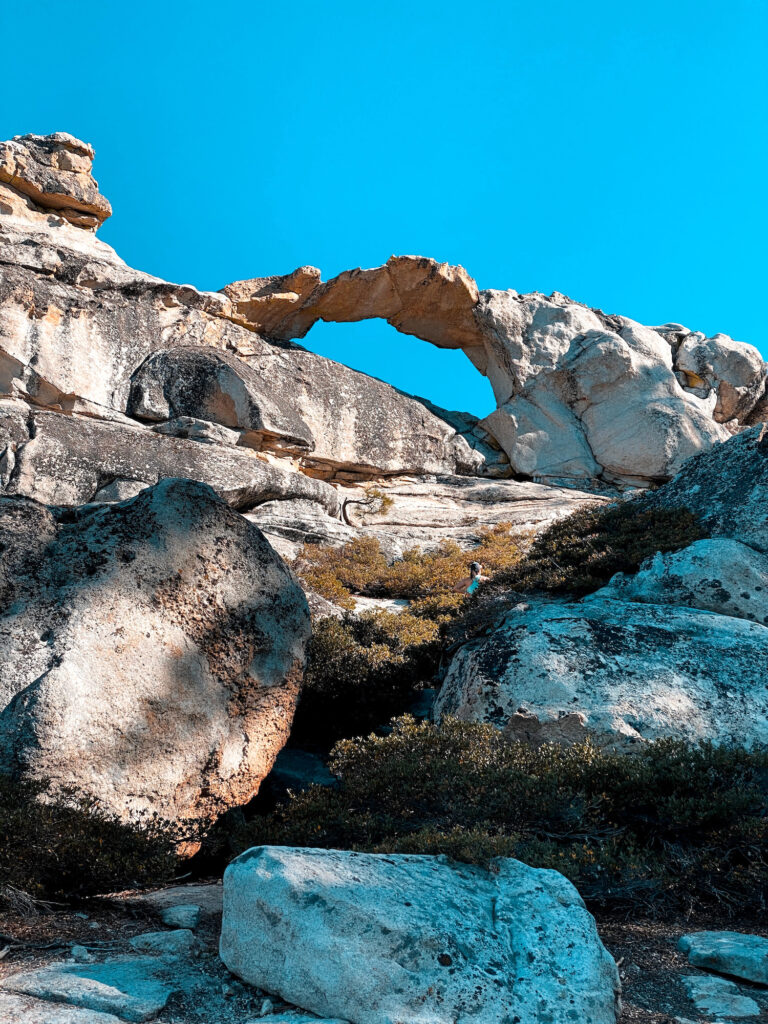
After watching a sublime sunrise, we ate breakfast, and began to pack up. Even though it was only 8am, the sun was already hot. The initial trek was all uphill and I took baby steps as I worked my way up the hill. The backpack felt heavier, don’t ask how! I was carrying less food and water! The trail eventually leveled out and we were back in the forest…and shade! As we trudged along we came across a sign that said “Indian Rock”. So we googled it (yes we had phone connection in certain spots). The pics looked interesting so we left our backpacks in the beginning of the trail and started to hike up the path. I groaned mentally at another uphill.
Indian Rock
Indian Rock was pretty cool, it reminded me of the arch formations you see in Utah’s national parks! I would highly recommend this trail (it’s super short) before you head back to the parking lot.
How do You Poop in the Wilderness?
Ah the million dollar question! When I posted about my trip on Instagram, the majority of the questions I received were about pooping in the wilderness. Growing up in India, I am no stranger to Indian toilets and squatting. And that’s exactly what it takes to go in the wild. In some national parks, you have to park your manure out with you. Luckily at Yosemite, you can bury it.
The easiest way is to carry a small, light shovel with you. Dig a hole at least 6” deep. Once you’re ready, squat. Your muscles may cramp a bit but just shift around, it’ll be fine. Enjoy the view in front of you 🙂 Once you’re done, use your biodegradable wet wipes to wipe off. While the sign at the trailhead said you can bury your toilet paper, it’s good practice to carry it back with you out of the national park, as part of the 7 Leave No Trace principles.
What Outdoor Gear do You Need?
For backpacking in the wilderness, this is the gear I used:
- Dry fit shorts (1 pair, wore it both days)
- Sports bras (2, since I sweat a lot)
- Dry fit tops (2, since I sweat a lot)
- Silk thermal pants (1, at the campsite in the evening and at night for sleeping)
- 1 full sleeves top (1, at the campsite in the evening and for the night)
- 1 down jacket (1, only for the campsite at night and for sleeping)
- 1 beanie (For the night in case it gets too cold)
- Gloves (I didn’t need this at all)
- Contact lenses (1 pair, need a small mirror next time) + eye glasses
- Sun hat
- Face wipes (I used this instead of washing my face)
- I used my fingers to brush my teeth, and borrowed toothpaste
- Small vial of perfume (Will SKIP next time!)
- Biodegradable ass wipes (Use this for poop and peeing)
- Down sleeping bag
- Tent (shared with my friend, so it was his tent)
- 3 bear canisters (split between the 4 of us, 2 medium, 1 large)
- Inflatable sleeping pad (more comfortable than just the sleeping bag as the ground is hard. Get a SELF inflating pad next time)
- MSR PocketRocket stove (comes with measuring cup and cooking pot)
- 1 titanium spoon to mix my food packet
- Freeze dried food packets – 1 per meal. (Split 1 packet between 2 people)
- Journal + pen
- Mask for Covid-19
- Hiking boots + 1 pair of flip flops for camp at night + hiking socks + regular socks for night time.
- Camera gear: Gorilla mini tripod + SonyA7000 + 28-70 lens
- 70 SPF Sunscreen for body & face
- Earlplugs
- Daily Vitamins
- Trail mix + protein bar + chocolate bars
- 1 small lightweight shovel (my friend carried this)
Why I recommend Backpacking in the Wilderness?
Backpacking in the wilderness is different from car camping. In the wilderness, you can set up your tent anywhere you wish in your designated campsite location. So if you pick North Dome you can literally camp anywhere there (as long as you follow the rules I’ve outlined above). Since there is a wilderness permit quota, you won’t encounter too many other people either. On my trip, there was no-one else but me and my three friends on our first night. That solitude was bliss (even though I was scared at night thinking of bears!)
The wilderness also gives you access to pristine scenery that isn’t available with car camping. With car camping, I would have not have been this close to Half Dome with such expansive, open views. If you enjoy the outdoors, definitely give backpacking in the wilderness a chance. It can give you a new perspective on your life, the world, and who knows…you just may find yourself way more connected to everything around you, including yourself, once you return!
8 Responses
This is really well described and useful. I love how you explain every detail and make your trip useful for anyone who is not so experienced.its really good to go at your own pace and just enjoy . i used baby wipes a long time ago as well during camping. Its obvious camping in the wild must be a great experience!
Thank you so much Anjali! Yes camping in the wild is a unique experience – I really benefitted and highly encourage anyone to attempt it once 🙂